Microsoft Outlook 2007
This page explains how to set up Microsoft Outlook 2007 to send and receive e-mail for a POP MailBox you (or someone else) created (for you). (If you want to set up an IMAP account CLICK HERE. If you need to know the difference between a POP Email account & an IMAP email account CLICK HERE.)
Tip: make sure that the program you are using is Microsoft Outlook, and not Microsoft Outlook Express. These two similarly named programs have different set up instructions. Be sure you do not see the word "Express" on the screen when you start the program. (If you're using Outlook Express, see "Setting up Outlook Express".)
1. Start the Microsoft Outlook program.
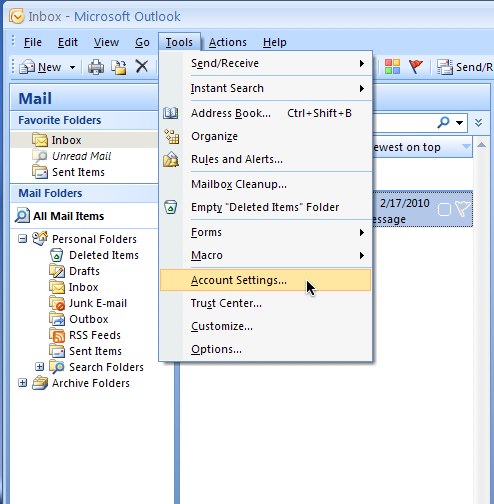
You can use the Start menu to start Outlook 2007. When it opens, click Tools, then Accounts Settings from the menu bar:
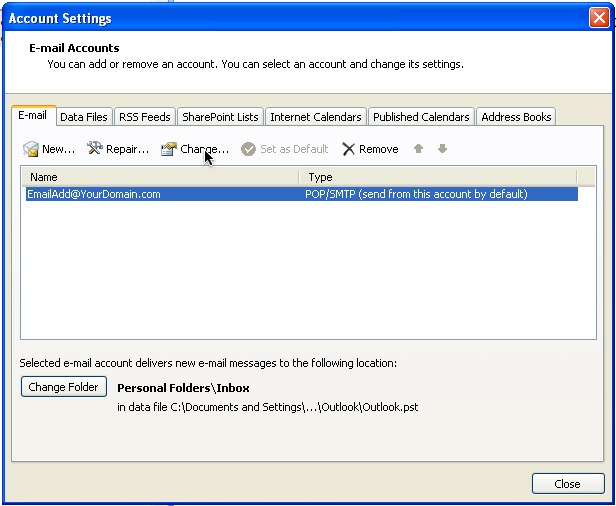
2. The "Accounts Settings" window appears.
Make sure the E-mail tab is selected, then click New.

If you are adding another Email Account to your Outlook profile, you will see your existing Email Account. Just click on NEW.
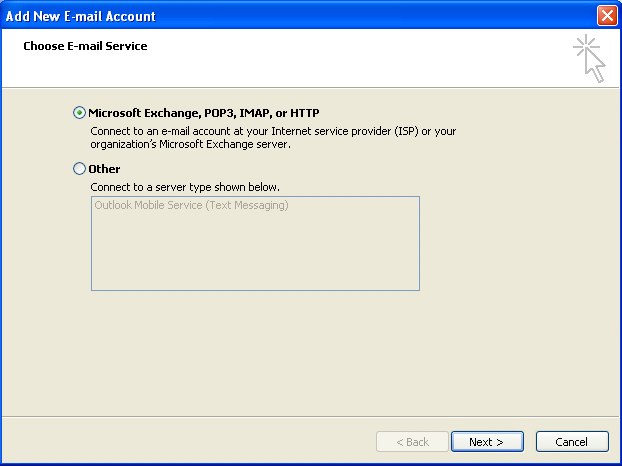
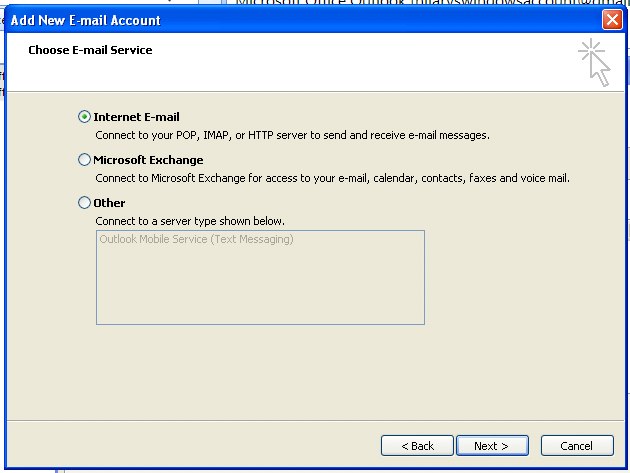
3. You are asked to choose the E-mail Service.
Choose Microsoft Exchange, POP3, IMAP or HTTP, then click Next.
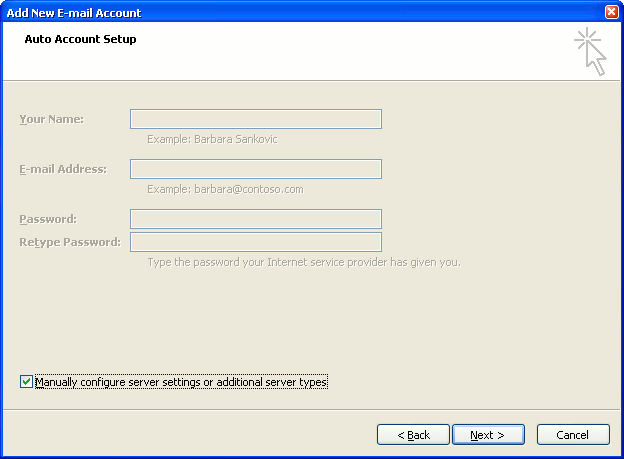
4. The "Auto Account Setup" screen appears.
When this window appears, simply leave the fields empty, check the Manually configure server settings or additional server types checkbox, then click Next.
5. The "Choose E-mail Service" screen appears.
Choose Internet E-mail, then click Next.
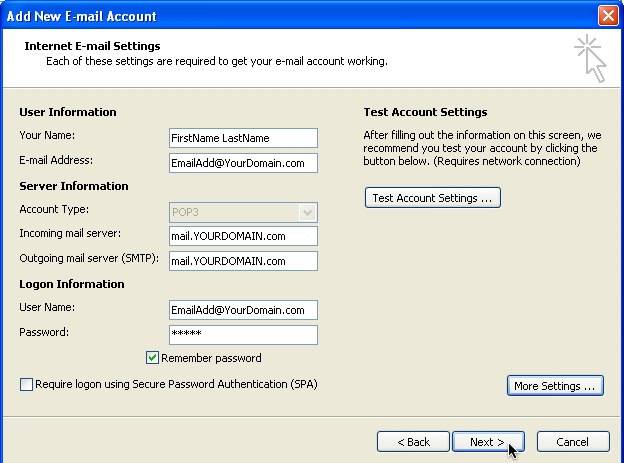
6. The "Internet E-mail Settings" screen appears.
This is the window where you'll enter most of your account settings.
The INTERNET EMAIL SETTINGS are as follows:
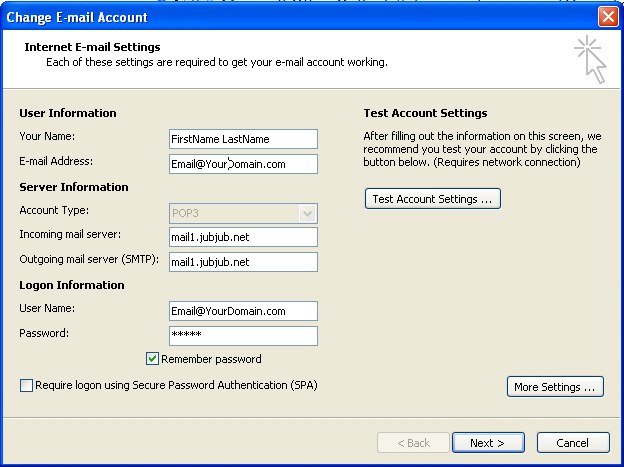
- "Your Name" is the name that other people will see when you send them e-mail. It should usually be your real name, such as John Smith or Joan of Arc.
- Enter your "E-mail Address". The address must be the e-mail address of the POP mailbox you created or was created for you.
- For "Account Type", choose POP3.
- Enter mail1.jubjub.net for both the "Incoming mail server" and "Outgoing mail server (SMTP)".
- Enter your FULL e-mail address again as the "User Name".
- Type your email password into the "Password" box. This is the password you chose (or was assigned to you) for this e-mail address when you (or someone else) created the mailbox through your site's Control Panel. Remember that this password is different from your Control Panel password. (**You can "check" Remember password if you don't want Outlook to ask you for the password each time you read e-mail.)
- Make sure that "Require logon using Secure Password Authentication (SPA)" is not checked.
- Do not click "Test Account Settings" yet; it will not work until you complete the next steps.
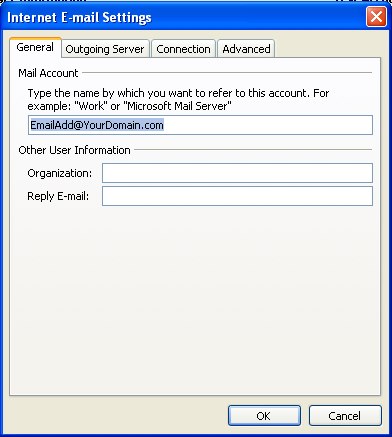
7. Click the "More Settings" button.
A new "Internet E-mail Settings" window appears. The Internet Email Settings Window appears, and will default to the GENERAL SETTINGS tab:
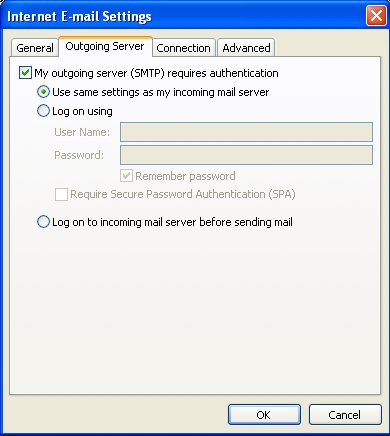
8. Choose the "Outgoing Server" tab.
In the "Outgoing Server" tab, check My outgoing server (SMTP) requires authentication.
Select Use same settings as my incoming mail server.
9. Choose the "Advanced" tab.
Click the "Advanced" tab and look at the "Outgoing Server" setting.
The following PORT NUMBERS SHOULD BE UPDATED as FOLLOWS:
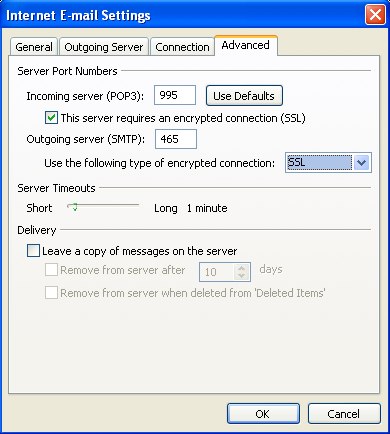
The "INCOMING SERVER (POP3)" should be updated to Port 995, for POP3 setups, and "THIS SERVER REQUIRES an ENCRYPTED CONNECTION (SSL)" should be checked.
The "OUTGOING SERVER (SMTP)" should be updated to Port 465, for POP3 setups. And the DROP DOWN for "Use the following type of encrypted connection:" Should be set to "SSL"
LEAVE A COPY OF MAIL ON THE SERVER:
It's also good to probably check "Leave a Copy of Mail on the Server", and set a time when Outlook will delete the email off the server.
This is useful if you are checking your email from various computers (desktop and a laptop) or mobile devices such as a Blackberry or iPhone. Checking this will instruct Outlook to CHECK YOUR EMAIL account and DOWNLOAD your email from the SERVER, but LEAVE A COPY of it on the SERVER for the time you specify (5 days is usually good), so that your iPhone or Blackberry or other computer will also be able to download the same email, before it disappears off the server.
So be sure to check the "REMOVE FROM SERVER" after "5 Days" or "7 days" as well.
10. Click OK to close the "Internet E-mail Settings" window.
After you close the "Internet E-mail Settings" window, the "Add New E-mail Account" screen will still be visible.
11. Test the settings.
Click Test Account Settings. Outlook will usually tell you that "all tests completed successfully".
If Outlook tells you a test failed, double-check to be sure you've entered the settings correctly.
If Outlook still tells you that a test failed, we recommend continuing anyway. This is because some software on your computer (including Norton Antivirus) can make the "Test Account Settings" feature fail, even when Outlook is correctly configured. In most cases, Outlook will work properly when you try sending real messages.
If the "Test Account Settings" window is still open, close it to continue.
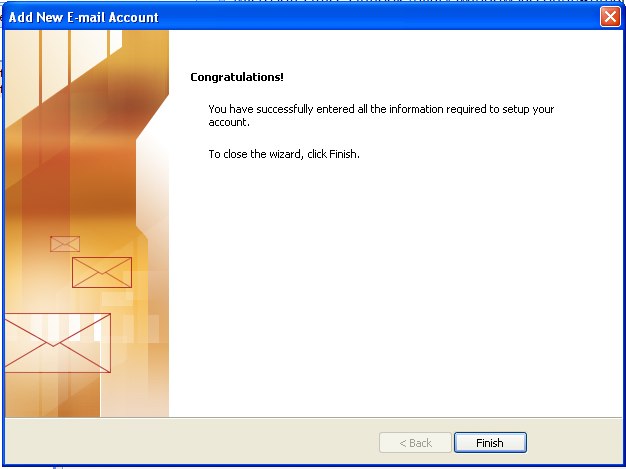
12. Finish the wizard.
Click Next, then Finish.
Outlook setup is complete
You're finished! Try sending yourself a test e-mail message to make sure it works.
Optional additional steps: Leaving copies of mail on the server
Finally, if you read e-mail in more than one program, you may want to leave a copy of each read message on the server (LINK TO ANOTHER ARTICLE)
