This page explains how to set up the Microsoft Outlook 2011 e-mail program on Mac OS X for an IMAP mailbox that you've created.
Before you continue, you should enter your e-mail address (the address you want to set up in Outlook) in the box above. Entering your e-mail address makes sure that the instructions below are correct.
To set up Outlook 2011, make sure the Outlook program is running, then follow the instructions below.
1. Add a new account
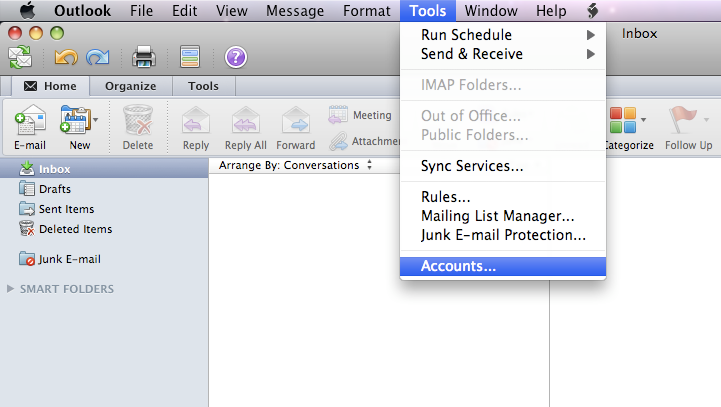
Click the "Tools" menu and choose "Accounts".
2. The "Account" window appears.
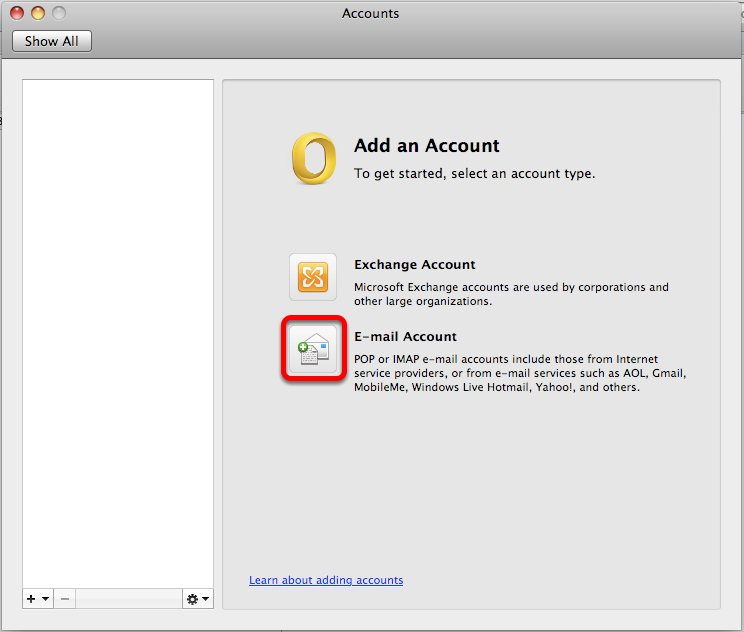
Click the "+" button and choose "E-mail".
3. Enter your account information as follows:
- E-mail address: your e-mail address (must be all lowercase)
- Password: your e-mail password
- User name: your FULL e-mail address (must be all lowercase)
- Type: POP3
(Note - IMAP is also supported by our mail server. We recommend POP3 for now, but you can select IMAP if that is your preference (as in the Screenshot below). You can read about the differences, and decide whether IMAP or POP3 is the best solution for you. ) - Incoming server: "mail.yourdomain.com"
- If setting up as POP3 (recommended), Under "Incoming server", make sure PORT is 110
- If setting up as IMAP, Under "Incoming server", make sure PORT is 143
-
Under "Incoming server": As of right now, make sure "Use SSL to connect" is unchecked
- Outgoing server: "mail.yourdomain.com"
- Under "Outgoing server": As of right now, make sure "Use SSL to connect" is unchecked
- If setting up as POP3 (recommended), Under "Outgoing server", check Override default port then change the port number from "25" to "587".
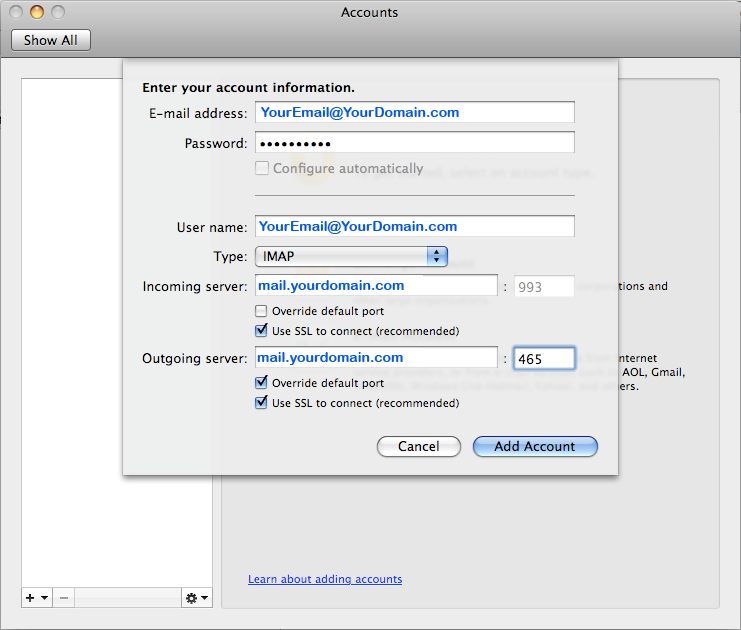
- If setting up as IMAP, Under "Outgoing server", check Override default port then change the port number from "25" to "465".
Your resulting window should look like this:
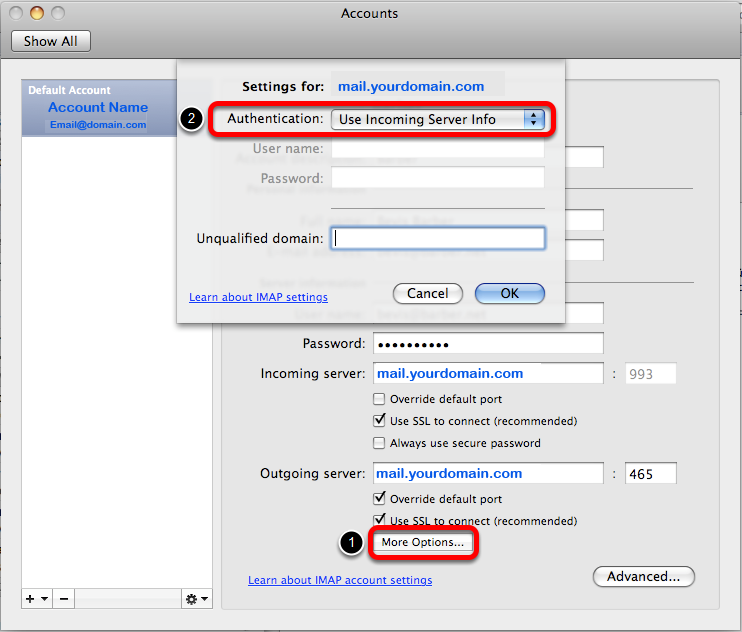
4. Click on the More Options button.
In the Pop-Up Window: Select "Use Incoming Server Info" from the authentication list and then click OK.
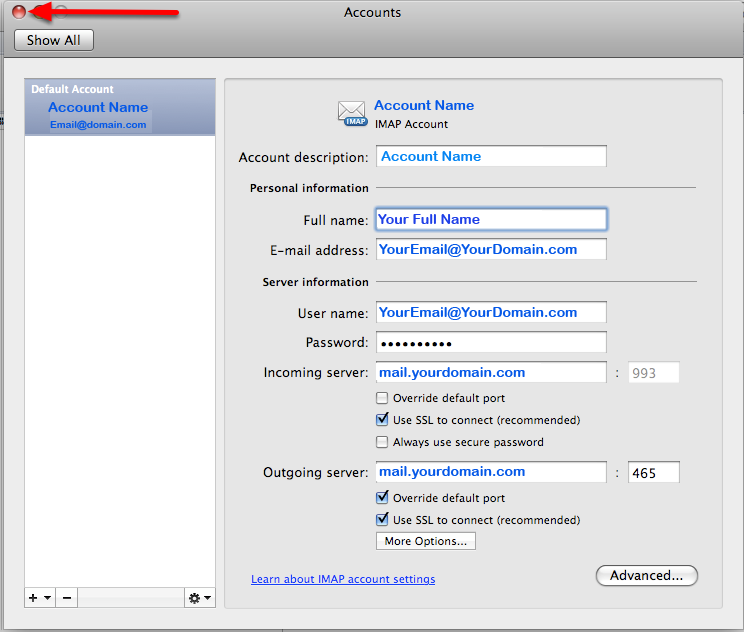
5. Your settings window should now look something like this, and you can now CLOSE the Accounts Window.
6. Outlook will automatically download your email messages.
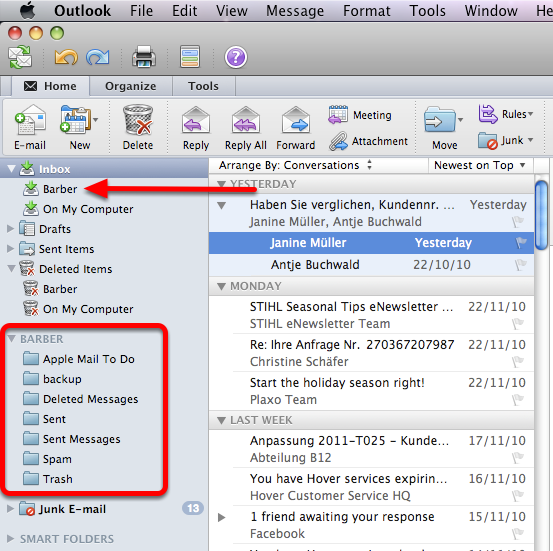
If you have set it up as IMAP, any MAP folders you have set up on the server will also appear below the default OUTLOOK folders.
The account configuration is completed!
You're finished! Try sending yourself a test e-mail message to make sure it works.
