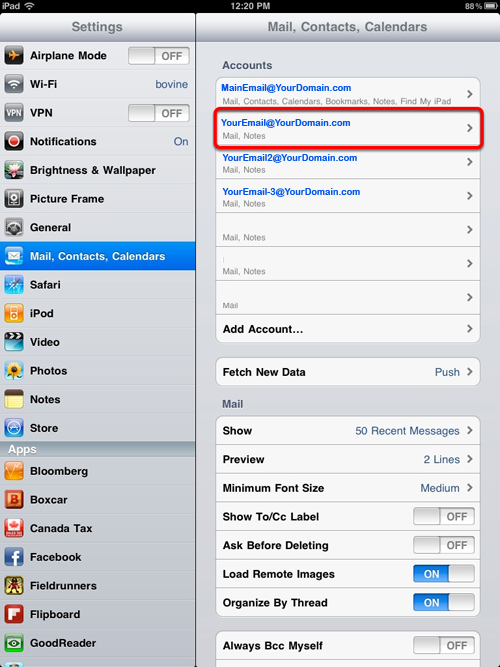
This page explains how to set up an iPad running iOS 4.2 to send and receive e-mail as an IMAP or POP3 account. (If you don' tknow whether you should set it up as an IMAP or POP3 account, click here to read the differences, and decide) (You must have first created the mailbox on our servers.)
The pictures below are from the iPad 4.2 screens:
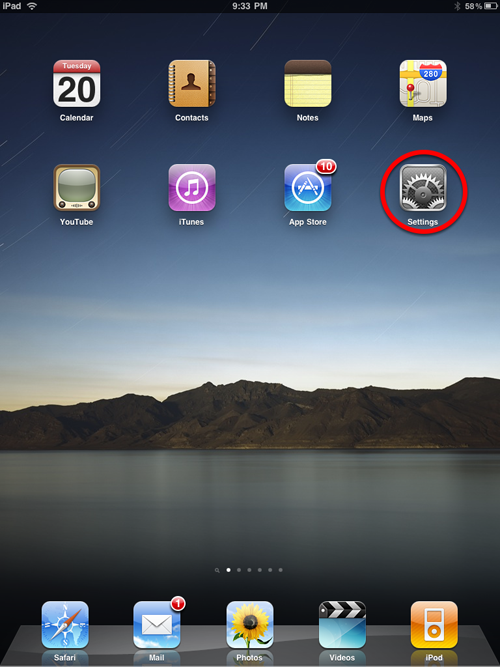
1. Go to the mail setup screen.
Tap Settings on your iPad home screen. If you have installed additional apps from Apple's App Store, this button may be located on a different home screen than the one pictured. By default, it is on your main home screen.
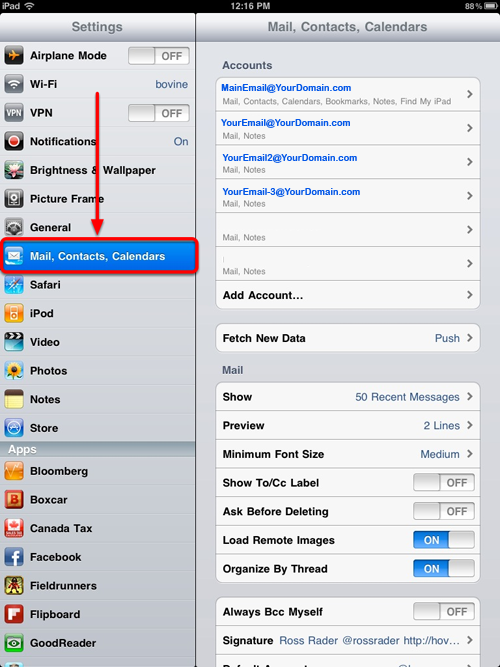
2.Tap Mail, Contacts, Calendars:
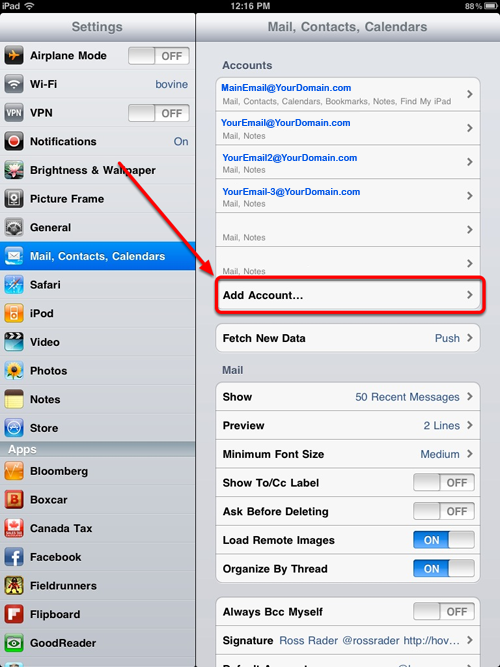
3. If you have already configured an email account on your iPad, you will need to tap Add Account.... If you have not yet configured any email accounts on your iPad, skip to the next step.
4. Tap Other at the bottom of the list.
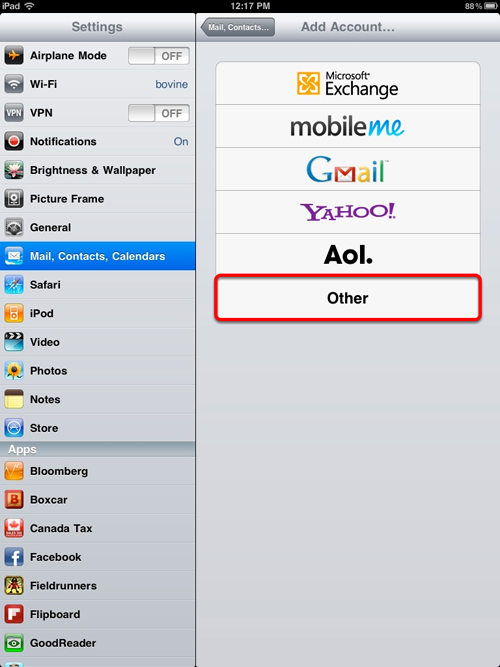
5. Tap Add Mail Account.
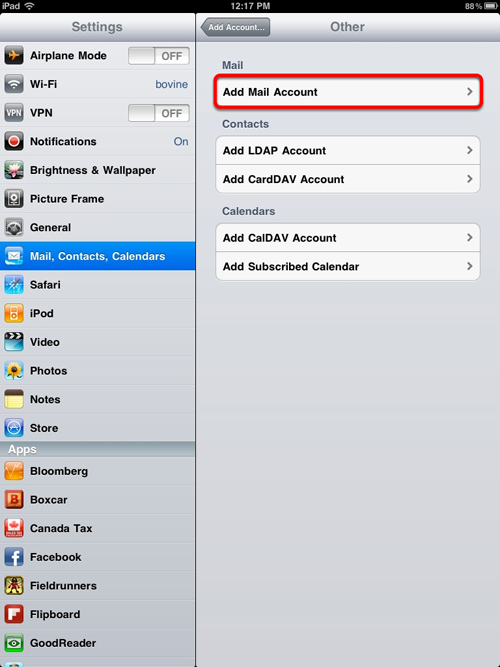
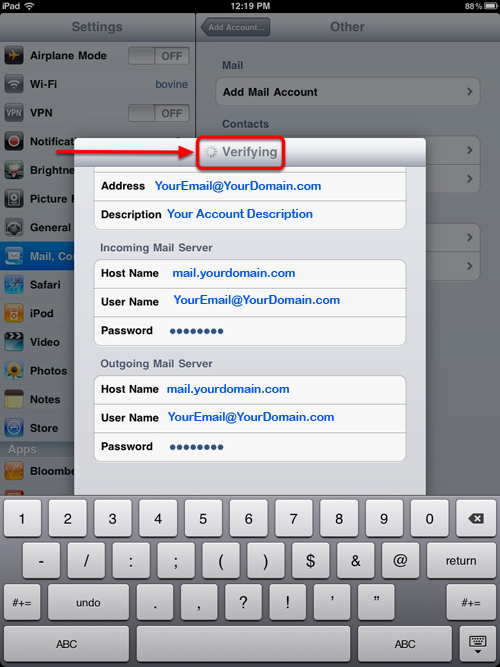
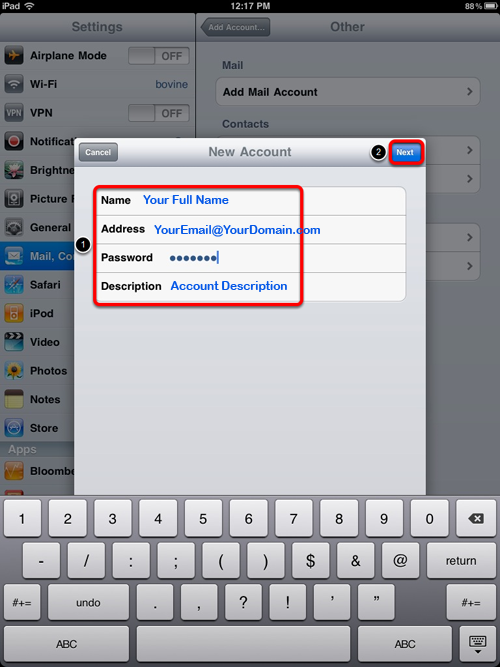
6. Enter in the information requested.
Type the following settings:
- Name: Enter your name as you want it to appear on outgoing messages.
- Address: Enter your full email address.
- Password: Enter your email password.
- Description: Enter a title to identify this account on your iPad.
When you've entered all the appropriate information, tap NEXT.
Some things to bear in mind:
- The "User Name" in both sections must be all lowercase.
- The "Outgoing Mail Server" user name and password are required, not optional. You need to enter your user name and password if you want to send mail.
- It's correct for the "Incoming Mail Server" and "Outgoing Mail Server" settings to be identical.
- The passwords you enter here must be the e-mail mailbox password (which is not necessarily the same as your master account (DirectAdmin or FTP) password).
When you're finished, click NEXT in the upper-right corner of the screen.
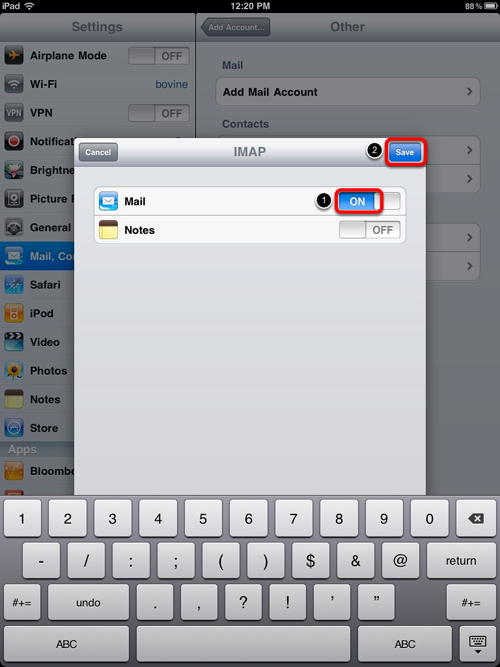
7. Choose either IMAP or POP.
Choosing IMAP will keep messages in sync between your iPad and your other devices. Choosing POP will provide you with slightly faster download times, but your messages will not be synchronized with your other devices.
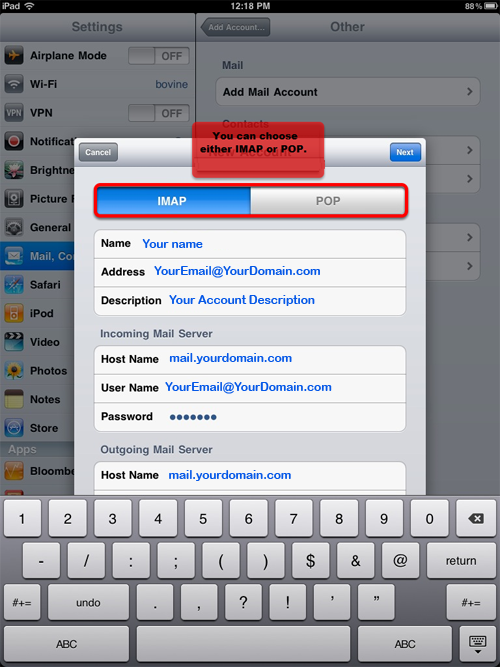
8. Configure the Incoming Mail Server settings:
Host Name - Enter mail.yourdomain.com
User Name - Enter your full email address.
Password - Enter your email password.
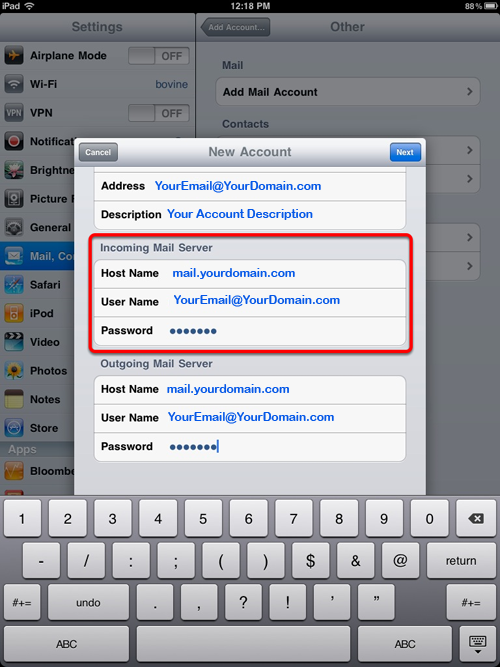
9. Configure the Outgoing Mail Server settings:
Host Name - Enter mail.yourdomain.com
User Name - Enter your full email address.
Password - Enter your email password.
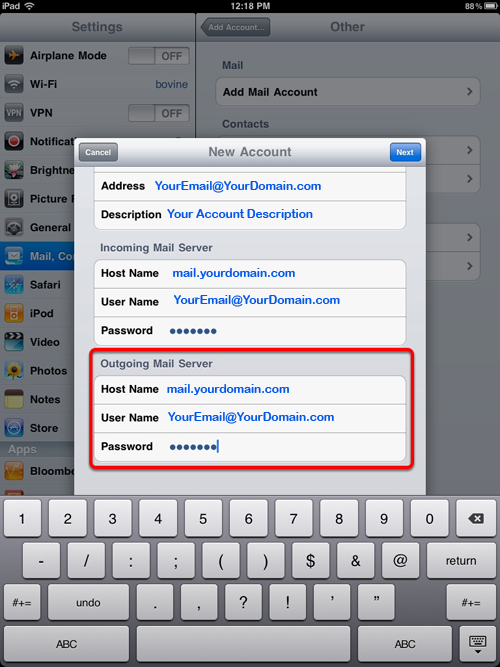
Tap the Next when you are finished.
DIFFERENT SERVER SETTINGS:
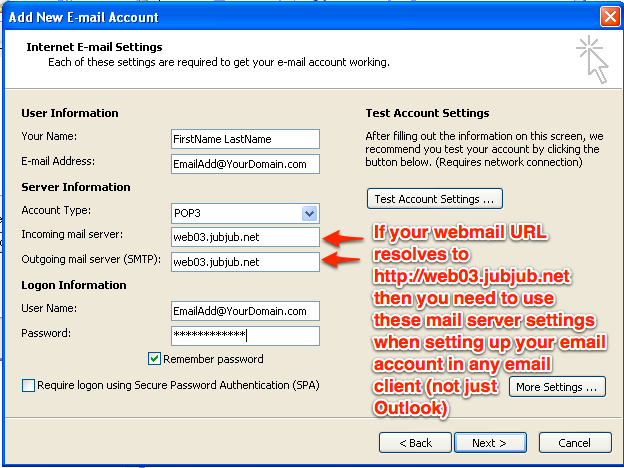
IF YOUR WEBMAIL URL RESOLVES to "http://web03.jubjub.net", then the settings are slightly different.
To check if your website is on web03, CHECK YOUR WEBMAIL, by entering HTTPS://www.YOURDOMAINNAME.com/WEBMAIL in the ADDRESS BAR of your browser.
If Squirrel Mail appears, and resolves to the URL: "http://web03.jubjub.net/WEBMAIL" (as shown in the screenshot below) then your site is hosted on WEB03, and requires different settings.
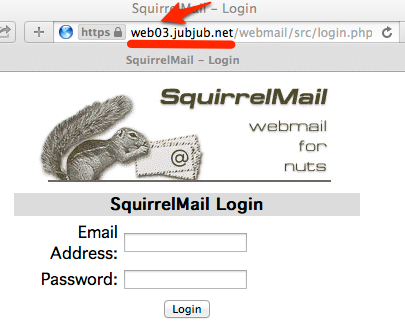
For those domains that use web03.jubjub.net settings, the INCOMING and OUTGOING HOST NAME SHOULD BE:
SET INCOMING HOSTNAME to: web03.jubjub.net
SET OUTGOING HOSTNAME to: web03.jubjub.net
